
Connecting up your Turntable or Tape Deck
This page contains a brief description of the tools that VinylStudio provides to help you hook up your audio hardware. If you're looking for the old instructions which cover recording through an internal sound card, you can find them here. The rest of this page is for people with a USB device, and explains how to get the best out of it with VinylStudio. Connecting up Firewire devices is very similar.
Connecting up Your Hardware
Plug your USB device into any USB port on your computer and turn it on. If you are using a USB turntable or tape deck, that should be all you need to do. If you have a conventional turntable or tape deck, connect it to your USB device using a standard phono cable. If you are connecting a turntable, you need a device containing a phono preamp, such as the NAD PP-4 or the ART USB Phono Plus. A tape deck can be connected to a device without one, although most USB phono preamps also have line input sockets. Then set a record or tape playing and move on to the next step.
For higher-end devices, you may also need a driver disk or download from the manufacturer, although this is not usually needed on the Mac. Cheaper devices can generally do without. Consult the manual that comes with your device for details.
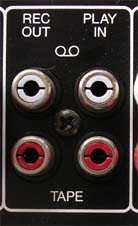
If you want to use the phono preamp built into your Hi-Fi, you can do. Look for a phono socket on the back of your amplifier labeled REC OUT, or TAPE REC or similar (if you have a tape deck connected to your Hi-Fi, this socket will be in use, so you will need to disconnect it). Run a standard phono cable from there to line-in on your USB device and that should be all you need to do. There may be a link connector between Play In and Rec Out. If so, you can safely remove it. Ensure then that the 'Tape' button on your amplifer is not pressed, otherwise you won't hear anything.
The Check Level Window
VinylStudio's Check Level window provides all the tools you need to ensure your audio device is working and to set the recording level and other options. For more advanced users, you can also enable recording equalisation (including RIAA) in this window. You will find more details about that here.
To open the Check Level window, go to VinylStudio's Record Albums tab and then click on the Check Level button. If there is a record or tape playing, you should then see the recording level indicators moving in time with the music:
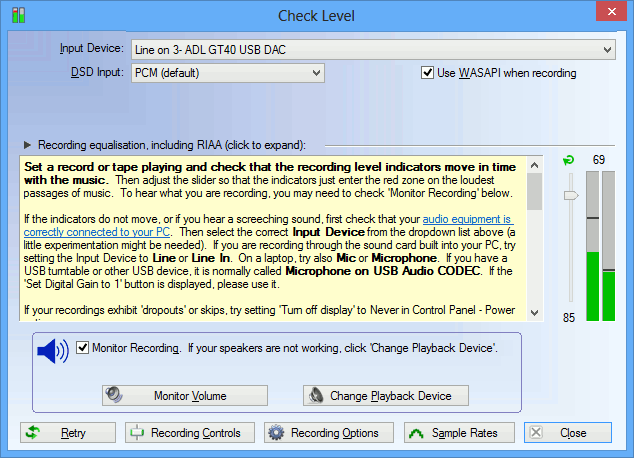
If you check the 'Monitor Recording' box (or sometimes even if you don't), you should hear what you are recording played back through your computer's speakers.
If no sound is getting through, a bit of experimentation might be needed:
- double-check your connections
- try selecting a different Input Device in the dropdown box
- on Windows XP, try selecting a different Sound Card in the dropdown box
- check that the recording level slider is not set at zero
To learn what the other controls in this window do, you can mouse over them in VinylStudio. Popup help will tell you what you need to know. You might want to investigate the Recording Options button to set your desired recording format and file type.
If Your Computer's Speakers are not Working
If you don't hear anything when monitoring your recording or playing your tracks, it may be because some USB devices change the default playback device (to themselves) when they are plugged in for the first time. This means that, in effect, your speakers stop working. If this happens to you, you can change the playback device VinylStudio uses from the Change Playback Device dialog. You can also reset the default playback device (as used by all other applications) by clicking on Change Default Playback Device in this dialog (not available in the Mac App Store version).

Software and website Copyright AlpineSoft, 2025.