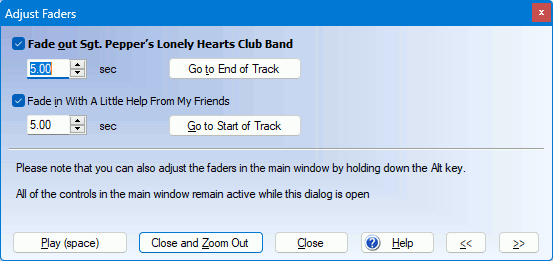

This dialog is displayed when you click on the Adjust Faders button (you will need to click on a trackbreak first) and allows you to focus on a single trackbreak to fade the tracks in and out (or, rather, out and in). You can continue to work in the waveform display while this dialog is open, but all other trackbreak markers are disabled.
The currently selected track is shown highlighted in blue, and parts of the waveform which have been faded out (which will include all preceding and subsequent tracks) are shown greyed-outand will not play until you select them (which you can do by clicking on them after closing this dialog).
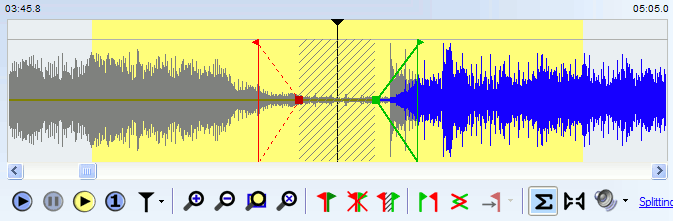
Once you have turned on fade-in or fade-out for a particular track, you can adjust the fade-in or fade-out points by dragging the markers in the waveform display; the Adjust Faders dialog does not need to be open to do this. To start playing from a marker, click on (but do not drag) the marker. To jump to any position in the track (even when the track is playing), click anywhere in the waveform display.
The >> and << buttons provide a convenient way to jump to the next or previous trackbreak respectively.
To start playing from one of the track break markers, click on Goto Start (or End) of Track and then click Play. To jump to any position in the track (even when the track is playing), click anywhere in the waveform display.
If you hear faint clicks with the faders enabled, enable the rumble filter in the Filter Settings dialog.